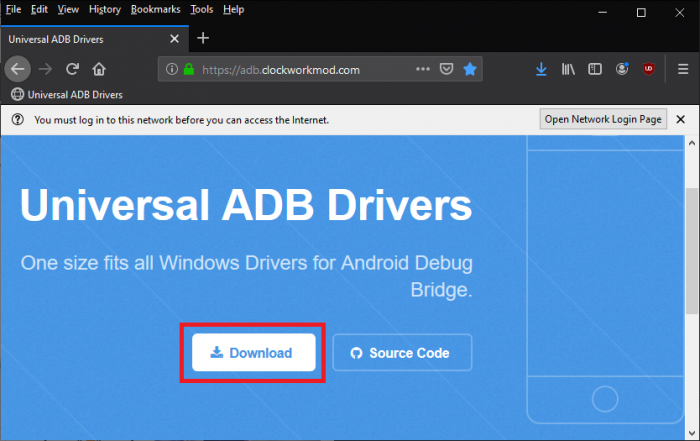
You may delete this file from your computer at the end of this guide or after your phone is successfully unlocked.
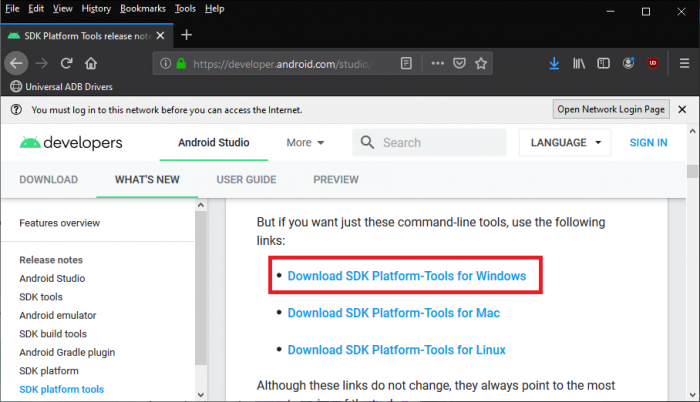
Step 2. Download the SDK Platform Tools from Android Developer’s website and extract the said file to your desktop so we can easily find it later. Note: SDK Platform Tools is needed here because it will allow you to perform functions available only for Android Developers. This will help you get into the “brain” of the phone and remove the sim lock from Verizon.
You may delete this file from your computer at the end of this guide or after your phone is successfully unlocked.
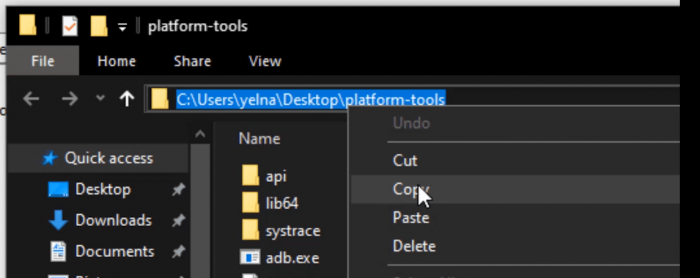
Step 3. Open the “platform-tools” folder, and then copy everything on its address bar.
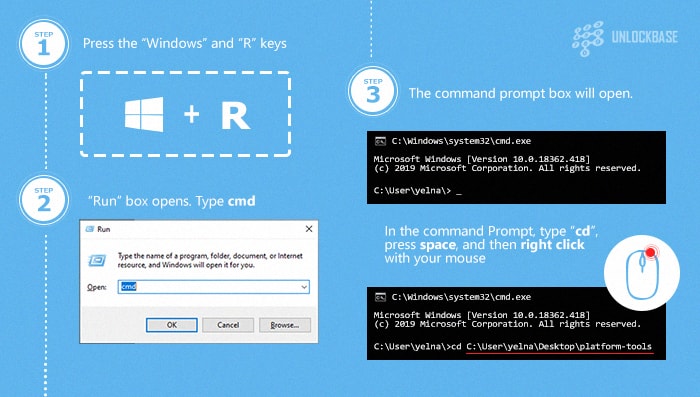
Step 4. Open the command prompt and type “cd” (without quotation marks), press space, and then right-click on your mouse
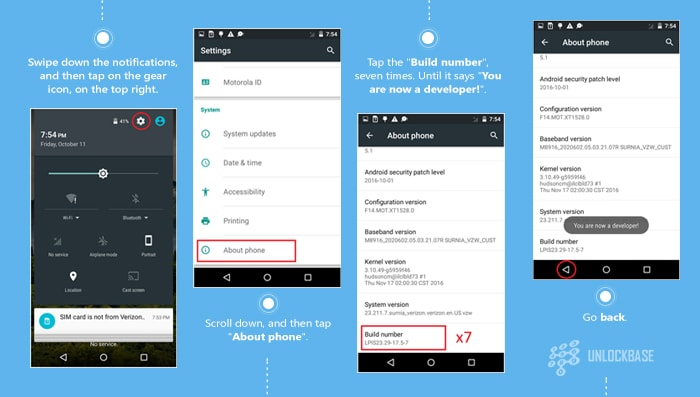
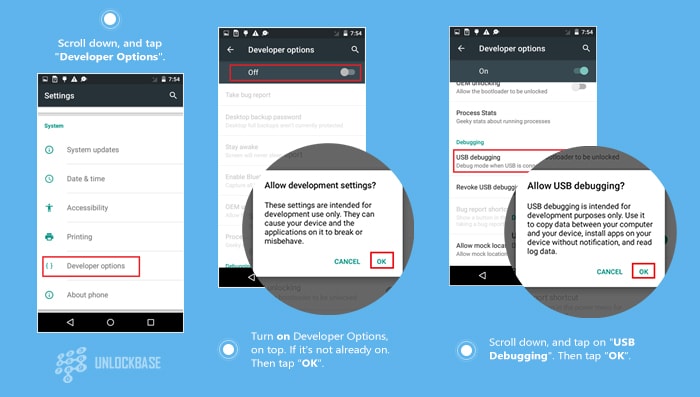
Step 5: Activate the Developer mode on the phone
Step 6. Allow USB Debugging on your phone.
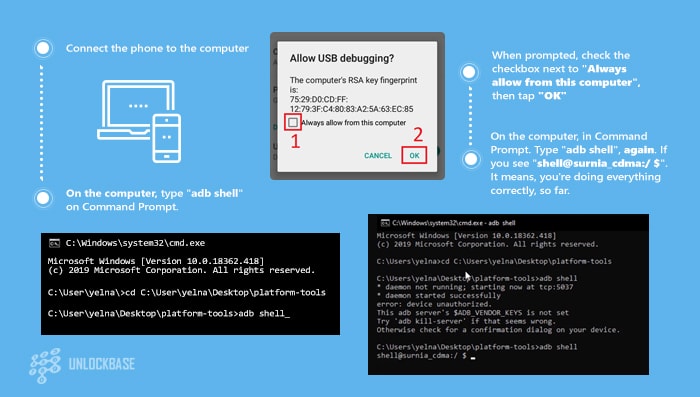
Step 7: Connect your phone to the computer with a USB cord. Type the following codes on your command prompt in this order. Note: DO NOT include the quotation marks.
• “Adb shell” and press Enter. After this, you will see a prompt on your phone. Tap box for “Always allow from this computer”.
• Type “adb shell”, again on your command prompt box (black box). If you see “shell@surnia_cdma:/ $”. It means you’re doing everything correctly, so far.
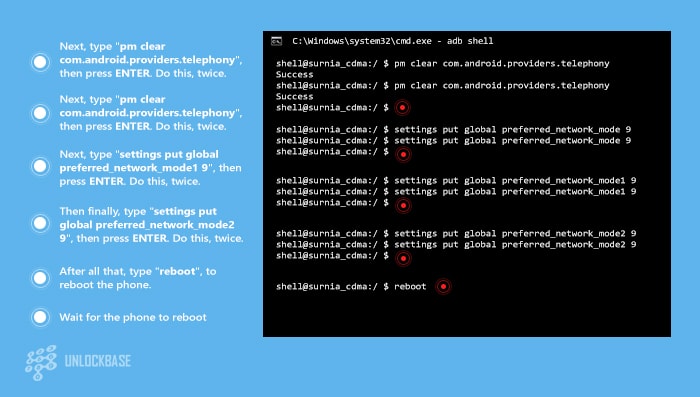
Step 8. Next, type the following codes in the command prompt box in this order. Note: DO NOT include the quotation marks.
• “pm clear com.android.providers.telephony”, then press ENTER on your keyboard. Do this, twice.
• “settings put global preferred_network_mode 9”, then press ENTER. Do this, twice.
• “settings put global preferred_network_mode1 9”, then press ENTER. Do this, twice.
• “settings put global preferred_network_mode2 9”, then press ENTER. Do this, twice.
• “reboot”, to reboot the phone.
It should look like this.
Step 9. Wait for the phone to reboot. If you see the network’s name on the upper left corner (and on the bottom of the screen), along with signal bars (upper right side). It worked!
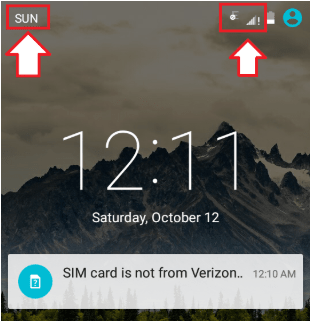
On the other hand, if the phone says “No Service” repeat step 8.
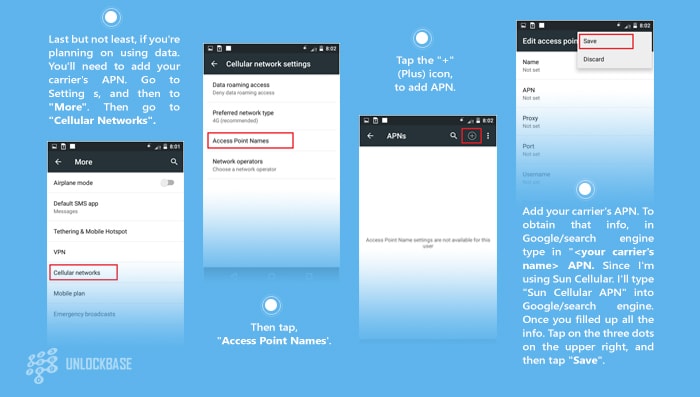
Step 10. Add your carrier’s APN. To obtain your APN’s info, click on the search bar and type your APN’s name. The example is using Sun Cellular so I typed “Sun Cellular APN”. Once you filled up all the info, tap on the three dots on the upper right, and then tap “Save”.
Step 11. Turn on your Data.
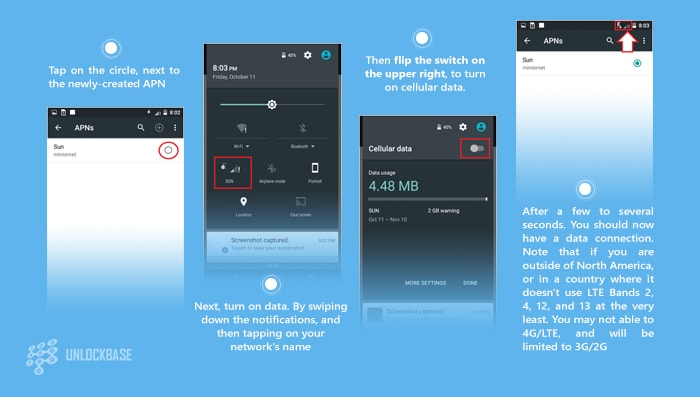
And that is the end of this guide! You may now disconnect your phone from your computer and remove all the files you have downloaded on your computer earlier.
If you’ve been able to successfully use another sim card using this guide, congratulations!
Do you have a phone that you want to sim unlock from your carrier? Let us know how we can help! We have unlocked over 8 million phones worldwide and we have the fastest turnaround times, perfect if you’re traveling or in a hurry!
If you think this guide has helped you immensely, return us the favor and share this with your friends or give us a shoutout on Facebook or Twitter!
Got any questions? Comment it down below and let’s talk about it!
MORE INFO


